Registry Views allow you to select the information you want to see, choose the required columns and apply filters to create a reusable view of Resolve data.
For example, a Registry View might be used to display post-meeting Motions, Resolutions and related Actions.
Registry also allows you to create a Snapshot, which preserves the data from a View at a particular point in time.
Before you begin
Access to Registry is controlled through your Security Profile.
Depending on your permissions, you may have:
- View access – allows you to open Registry Views, search and filter the displayed information, select columns and export the results.
- Edit access – also allows you to create, save, edit, share and delete Registry Views.
Site Administrators can configure Registry access through the relevant Security Profile.
Shared Views can also have their visibility restricted using Confidentiality/Security Groups or by sharing them with specific users.
For more information, see Resolve - Security Groups.
View Registry information
Select Registry from the Resolve Admin Portal and the current default Registry View will be displayed.
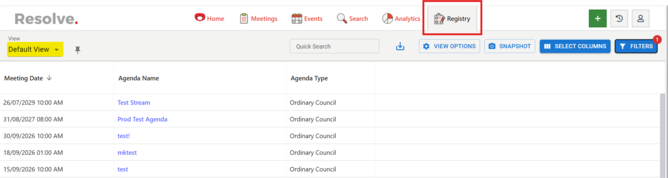
Select another saved View from the View dropdown (highlighted) where required.
Within a Registry View you can:
- Use Quick Search to filter the visible results using a search term.
- Select Download to export the results to PDF or Excel.
- Use Select Columns to choose which information is displayed.
- Use Filters to narrow the results using specific conditions.

Some fields provide additional functionality:
- Hover over fields such as Motions and Resolutions to view the full content.
- Select linked fields such as Agenda Name or Item Name to open that record in Resolve.
Create a Registry View
You will need Registry Edit access to create or permanently change a View.
Open Registry and use Select Columns to choose the information you want included in the View.
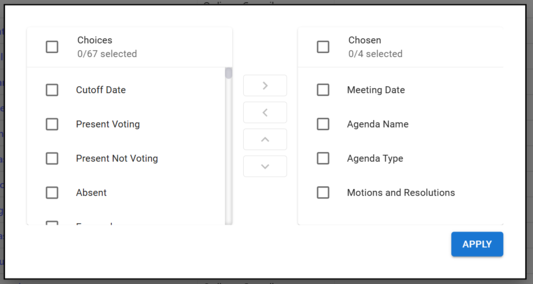
The left-hand side of the window shows all of the possible fields that can be added to a Registry View as columns and the right-hand side shows the columns in the current Registry View. On the left-hand side of the window, tick the fields you want to appear as columns and use the arrows to move them to the right. Use the "Up" and "Down" arrows to change the column order.
Apply any required Filters to define the records that should be displayed.
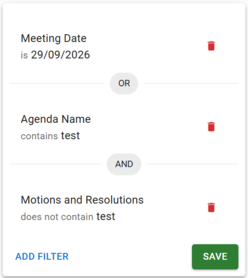
When you add multiple filters, choose how they work together: OR shows records that match any of the conditions, while AND shows only records that match every condition. Click OR/AND to switch between the two.
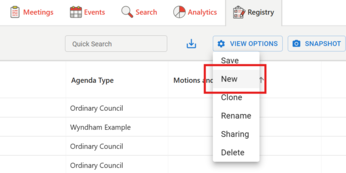
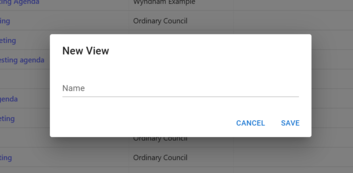
Open View Options and select New. Enter a name for the new View and save it. The new View will then be available from the View dropdown.
Edit or manage an existing View
Open the required Registry View and make any changes to its columns or filters.
From View Options, you can:
- Save – save changes to the current View.
- Clone – create a new View based on the current View.
- Rename – change the View name.
- Delete – remove the View.
- Sharing – control which Confidentiality groups or specific users can access the View.
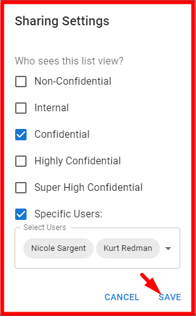
Note: The user who creates a Registry View becomes its Owner. Only the Owner can permanently change its columns, filters and sharing settings unless View ownership is transferred.
Create a Snapshot
A Snapshot saves the data from a Registry View as it appeared at that point in time.
This is useful when you need to retain a historical version of a register rather than viewing the current live data.
Open the required Registry View, then use the Snapshot menu.
Select Save to create a new Snapshot.
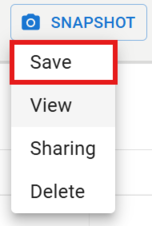
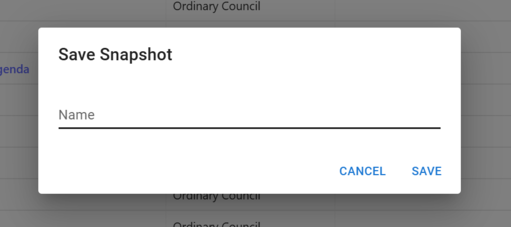
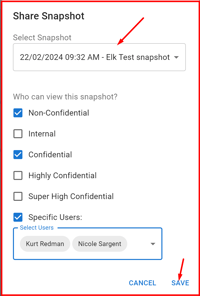
Existing Snapshots can also be:
- Viewed – reopen the saved information.
- Shared – make the Snapshot available to selected Confidentiality groups or specific users.
- Deleted – remove a Snapshot that is no longer required.
When viewing a saved Snapshot, Resolve can provide a link that can be copied and shared.
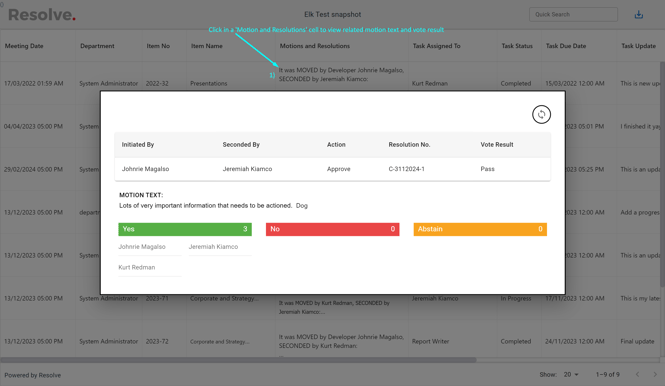
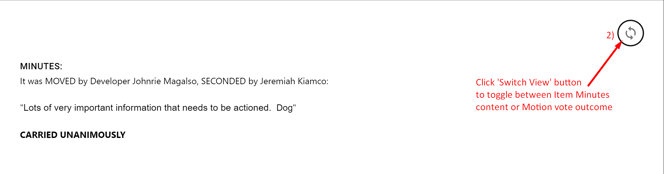
Within either a live Registry View or a Snapshot:
- Select a Motion and Resolutions cell to view the motion wording and related voting result.
- Use Switch View to toggle between Item Minutes content and Motion vote outcomes.
Change the Registry View Owner
The person who creates a Registry View is its Owner.
Resolve can optionally allow System or Meeting Administrators to transfer ownership of a View. Contact Redman Solutions Support if this functionality is not enabled for your council.
Once enabled, open the relevant View and go to:
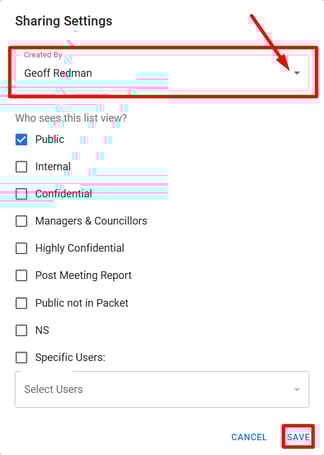
View Options > Sharing
Select the new Owner and click Save.